
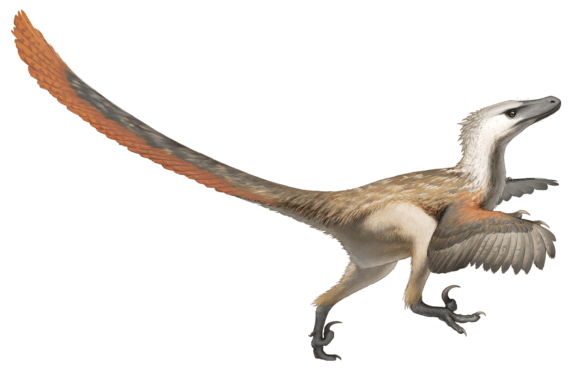
Did you know Velociraptors were about the size of a chicken and had feathers! Apparently the later was only discovered in 2007 according to this site, so we’ll give Jurassic Park a pass for now.
Anyways, I wanted to have a play with Velociraptor and put together some instructions on how to spin it up in AWS and connect it to a Google Domain; so I grabbed the official documentation and worked through it.
AWS is a great option for this type of situation because it’s super quick to get up and running, and is highly configurable to what you need. Might be a good idea to keep an eye on the costs though just in case. That being said, Velociraptor will run on a free instance, so that should get you up and running quickly. Further testing for your use case is recommended as to the exact configuration and retention you may need.
Similarly, Google make it’s super easy to purchase and configure your domain to get you working in no time. You may already have a domain through another provider, and I’ll have to explore how to modify DNS records on other sites. But my networking understanding is limited, so ease of use through Google Domains is preferable for me.
Here’s my step by step guide for getting up and running!
Building our Server on AWS
- Login to AWS and navigate to the EC2 page
- Attach the bosses credit card
- Launch Instance!
- Select an OS
The instructions recommend an Ubuntu box as the host. The tool will work on Windows servers but speaking to Mike, he says that it’s unnecessary overhead – not to mention needing a Windows license.

- Customise the specs of our instance
The instructions say 8-16GB of memory for 5-10k clients. For my testing I selected t2.micro but in production you will need to choose a more powerful instance.The beauty of AWS means we can dynamically expand as necessary

- Step 3 is “Configure Instance Details”
I have no need to mess with anything in here, but you may! - Storage
Next add some storage; I’m keeping it within the free tier and not collecting a huge amount off my test client. I do have two volumes attached – one for my OS and one for my data volume. We’ll have to make sure we configure that properly when we first login to the instance.Regarding storage sizes – You will need to consider the number of hosts, and the type of data you’re trying to pull.
For example, if you’re looking for common Windows artefacts you may be pulling a few MB of Prefetch off every box, but the more boxes you have the more storage you’ll need if you want to keep them all. You can always archive your results, or clear them out once your investigation is done, but just something to be wary of.
Or just keep attaching more and more storage!

- Add Tags – Skipping this part.
- Configure your security groups
We’ll want to open 80, 22 and 443. This is so we have access to the web interface and also SSH access. (Yes there’s 8080 in the screenshot below, disregard it!)I would recommend locking down the IP addresses that are allowed SSH access from these ports, primarily because the tool has a pretty good level of access to the hosts on your network and you don’t want that in the hands of an adversary.
We’re leaving HTTP/HTTPS open to the Internet so you can access it globally, but also so LetsEncrypt can automint the certificates. This would mean that your passwords need to be very secure. It is recommended to configure Google OAuth Single Sign On for logging in to the web interface.

Double check your settings and save your PEM key so you can login via SSH and you’re done with the basic EC2 configuration.
Quick Side Track – DNS
We want to register a domain so that we can easily access the frontend (the Velociraptor web interface), so for this I’m going to use Google Domains. The setup for Google Domains is simple and the DNS propagation is fast too. That being said, you may have already registered a domain elsewhere and want to do that. I’ll have to look into how to get this configured at a later stage.
- Buy a domain, for this Lodrina let me use hexplates.com.
- Select DNS on the left hand side and go down to Synthetic Records. Change the dropdown to Dynamic DNS and enter in a subdomain.
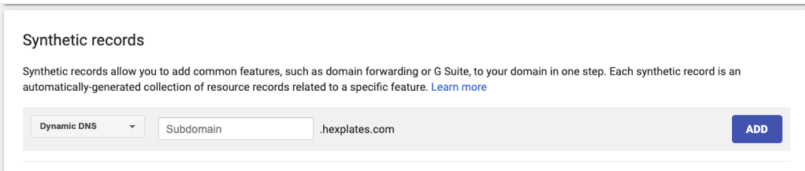
We need to get the credentials after we’ve added it by hitting the little arrow on the left of the record and selecting “View credentials”. This will be important for when we initialise the Velociraptor server.
The “Data” value will initially be set to 0.0.0.0 but will update once we configure Velociraptor the first time.
Getting Setup
Logging in is super simple, take our PEM key and SSH in. I’m using a Mac, but otherwise I’ve used Putty on Windows in the past. That being said, Windows has SSH now so maybe it’s simpler than it used to be.
- Login
ssh -i "key.pem" ubuntu@ec2-12-345-678-90.ap-southeast-2.compute.amazonaws.com
- Configure our secondary storage
I found a good set of instructions for creating a volume on our attached device. This allowed me to format and create and mount my data volume. Ensure to follow the instructions to create the volume, as well as the instructions under “EBS Automount on Reboot” to ensure the volume persists. - Permissions
Afterwards I needed to make sure I had permissions to write into that directory, otherwise Velociraptor will fall over. The below commands will allow us to write to the directory.sudo chown -R $USER:$USER /mnt/data chmod 755 /mnt/data
- Download the executable and set it to execute
cd /home/ubuntu

curl -L -o velociraptor-v0.3.4-linux-amd64 https://github.com/Velocidex/velociraptor/releases/download/v0.3.4/velociraptor-v0.3.4-linux-amd64

chmod +x velociraptor-v0.3.4-linux-amd64
- [Optional – execution permissions]
The next step only needs to be run if you want to run Velociraptor as a standard user. If you setup the deb package then that will run as root and you won’t have issues.
Grant access for the process to listen to low numbered ports (based on some Googling I found these instructions here)
sudo setcap CAP_NET_BIND_SERVICE=+eip velociraptor-v0.3.4-linux-amd64
If we don’t do this we’ll get the following error when we run the program the first time
velociraptor-v0.3.4-linux-amd64: error: StartTLSServer: listen tcp :443: bind: permission denied - Run velociraptor
Follow the onscreen instructions to provision a certificate with LetsEncrypt and generate configuration files:
./velociraptor-v0.3.4-linux-amd64 config generate -i

And that’s it, we’re now ready to go!
We’ll test it to see if it’s all working by running the following command:
sudo ./velociraptor-v0.3.4-linux-amd64 --config server.config.yaml frontend -v

And now we can access the front end by going to velociraptor.hexplates.com and entering our username and password.

The recommendation however is to run the server process as a service, and you can follow these instructions to get this working.
./velociraptor-v0.3.4-linux-amd64 --config server.config.yaml debian server

sudo dpkg -i velociraptor_0.3.4_server.deb
To test this out I rebooted the server with “sudo shutdown -r” and saw that everything was working on startup. Happy days!

Would be interested in hearing if other people are playing with the tool, and can share their thoughts 🙂

[…] ThinkDFIR Playing with the big chicken – (Velociraptor + AWS + Google Domains) […]
LikeLike